 English
Views: 0 Author: Site Editor Publish Time: 2025-08-08 Origin: Site


You can start aluminum welding by following a few simple steps and maintaining a positive mindset. First, put on your safety gear and ensure your workspace is clean and well-ventilated. Select the appropriate equipment for aluminum welding, such as a TIG or MIG welder. Always be aware of potential hazards like electric shock, fumes, fire, and burns, which are common in beginner workshops. Aluminum welding is essential for joining aluminum profiles used in various applications, including robotics and solar panels. Mastering aluminum welding opens up many new opportunities. Don’t worry if it feels challenging at first—consistent practice will help you improve!
Always wear the right safety gear. Keep your workspace clean and let fresh air in. This helps keep you safe when welding aluminum.
Use the correct tools like TIG or MIG welders. Clean the aluminum surfaces very well. Pick the right filler rods for strong and neat welds.
Set up your welder the right way. Watch the heat closely. Move the torch steadily to stop common welding mistakes.
Try MIG welding if you want a faster and easier way. Pick TIG welding if you want more control and a cleaner look on thin aluminum.
Clean your materials well. Check your setup often. Practice a lot to get better and make strong, lasting aluminum welds.
Welding aluminum might look hard at first, but you can learn it. You just need the right tools and some practice. Many businesses use aluminum because it is strong and light. It also does not rust easily. You can find aluminum in cars, planes, robots, and even medical tools. This guide will help you start welding aluminum safely and with confidence.
Having the right tools makes welding aluminum easier and safer. Here is what you need:
TIG welding electrodes like 2% Ceriated Tungsten for aluminum alloys.
Aluminum filler rods, such as 4043 or 5356.
MIG welding wire, like ER 4043 or ER 5356, if you use a MIG welder.
100% argon shielding gas for TIG welding.
A stainless-steel wire brush to clean the aluminum.
A TIG welder with AC balance for cleaning the oxide layer. Or use a MIG welder with a spool gun for feeding aluminum wire.
Use proper wire feeding tools, like U-grooved drive rolls and Teflon liners, to stop wire damage.
Keep your aluminum and filler rods in a clean, dry spot. This helps stop dirt from getting on them.
Tip: Shandong Lansi Aluminum Technology Co.,Ltd sells good aluminum profiles and accessories. This makes it easier for beginners to find the right materials for any aluminum welding project.
Welding safety is very important. You must protect yourself from sparks, UV light, and hot metal. Always wear:
An auto-darkening helmet to protect your eyes.
Safety glasses for extra eye protection.
Goatskin leather TIG gloves to keep your hands safe.
A leather welding jacket that fits well and lets you move.
Strong denim jeans with no cuffs.
Steel-toed work boots.
Wearing the right gear keeps you safe. It also helps you focus on learning how to weld aluminum.
Aluminum profiles come in many shapes and sizes. Each type changes how you weld and what your project looks like. Here is a quick chart:
Aluminum Profile Type | Welding Technique Impact | Filler Material Recommendation | Project Outcome Impact |
|---|---|---|---|
T Slot, V Slot, Curved | TIG and MIG are good for careful work | 4043 for smooth finish, 5356 for strength | Clean welds, strong joints, nice appearance |
Aluminum Extrusion, Tube | Needs careful heat control | Match filler to alloy | Stops warping, makes project last longer |
Angle, Beams, Custom | Might need special setup | 5356 for outdoor use | Extra strength and stops rust |
Picking the right profile and filler metal gives you strong, neat welds. Aluminum alloys like 6XXX series need matching filler rods. This helps stop cracks and keeps your project strong. If your welds will be outside, use a filler like 5356 that does not rust.
Welding aluminum lets you build many things, like machine frames or custom parts. With the right tools, safety gear, and knowledge, you are ready to start welding aluminum.
When you start preparing to weld aluminum, cleaning is the most important step. Aluminum forms a tough oxide layer that blocks proper fusion. If you skip cleaning, you will see weak welds, porosity, and cracks. Here’s how you can clean aluminum like a pro:
Degrease the surface with acetone or a non-chlorinated brake cleaner. Use white industrial paper towels, not shop rags, to avoid contamination.
Remove the oxide layer with a stainless steel wire brush made only for aluminum. Light pressure works best. For tight spots, use carbide burs, but be careful with air tools.
Avoid grinding discs or sandpaper. These can smear the metal and leave residue.
Clean only the area just bigger than your weld. This keeps the rest of the piece safe from contamination.
If you have to choose, always degrease first. For the best results, combine both degreasing and mechanical cleaning.
Note: Proper cleaning stops porosity and weak welds. Always wear clean gloves and keep your aluminum on a dedicated work surface.
Now, let’s get your welder ready. Both TIG welding and MIG welding need the right setup for strong, clean welds.
For TIG welding, use AC polarity. This setting helps break up the oxide layer as you weld. Adjust the balance control to get more cleaning action if you see black specks. Set the frequency to 120 Hz for most jobs. For thin aluminum, go up to 150-250 Hz for a tighter arc. For thick pieces, drop to 80-90 Hz for a wider bead. Set your amperage to about 1 amp per 0.001 inch of material thickness.
For MIG welding, use 100% argon shielding gas. This gas gives you a stable arc and stops porosity. Set your flow rate between 20-30 CFH. If you work outside, use the higher end of this range.
Pick the right filler rod. ER4043 works well for 6xxx series aluminum and gives a smooth, shiny weld. ER5356 is stronger and better for 5xxx and 6xxx series, especially if you need more strength or plan to anodize.
Use a Teflon or polyamide torch liner for MIG welding aluminum. These liners help feed the soft wire smoothly and prevent clogs.
Filler Rod | Best For | Key Properties |
|---|---|---|
ER4043 | 6xxx series alloys | Good fluidity, crack resistance, bright welds |
ER5356 | 5xxx/6xxx series | Higher strength, toughness, better for anodizing |
A safe and organized workspace makes welding aluminum easier and safer. Here’s what you should do:
Wear all your personal protective equipment, including helmet, gloves, and protective clothing.
Keep your area clean, well-lit, and free from clutter. This helps you avoid accidents and focus on your welds.
Make sure you have good ventilation. Use exhaust fans or fume extractors to remove fumes.
Control the temperature in your workspace. Moisture on aluminum can cause weld defects.
Keep flammable materials away and have a fire extinguisher nearby.
Use adjustable tables and chairs to stay comfortable and reduce strain.
Regularly check your equipment and PPE for damage.
Tip: A clean, safe workspace helps you get better results when welding aluminum and keeps you protected.
Welding aluminum takes practice, but you can master it with the right welding technique. Let’s break down the steps for both MIG welding and TIG welding. You’ll also learn how to control heat and avoid common mistakes.
MIG welding aluminum is fast and great for thicker materials. You can use this welding technique for big projects like industrial frames or automotive parts. Here’s a step-by-step guide to help you get started:
Clean the Aluminum Surface
Wipe away dust, oil, and grease with a lint-free cloth and chemical cleaner. Use a stainless steel wire brush made only for aluminum to remove the oxide layer.
Set Polarity to DCEP
Make sure your welder uses Direct Current Electrode Positive (DCEP). This setting is important for proper fusion.
Select Wire and Shielding Gas
Choose ER4043 for general use or ER5356 for higher strength. Use 100% argon shielding gas. Avoid CO2 mixtures.
Adjust Equipment Settings
Set wire feed speed and amperage based on wire diameter and machine specs. Keep shielding gas flow at least 20 CFH. Increase to 30 CFH if you see porosity.
Use Proper Welding Technique
Weld quickly to avoid overheating. Hold the torch at a 10-20 degree angle and use a push technique. Keep the tip about 3/4 inch from the workpiece. Use spray transfer mode for smoother beads. Stick to straight-line stringer beads for better penetration.
Troubleshoot Common Issues
If you see burn-through, increase travel speed or use thicker material. For dirty or porous welds, clean the base metal again and check your shielding gas. If cracks appear, pick a filler metal with low crack sensitivity.
Tip: Practice torch handling before striking an arc. This helps you keep a steady hand and avoid contamination.
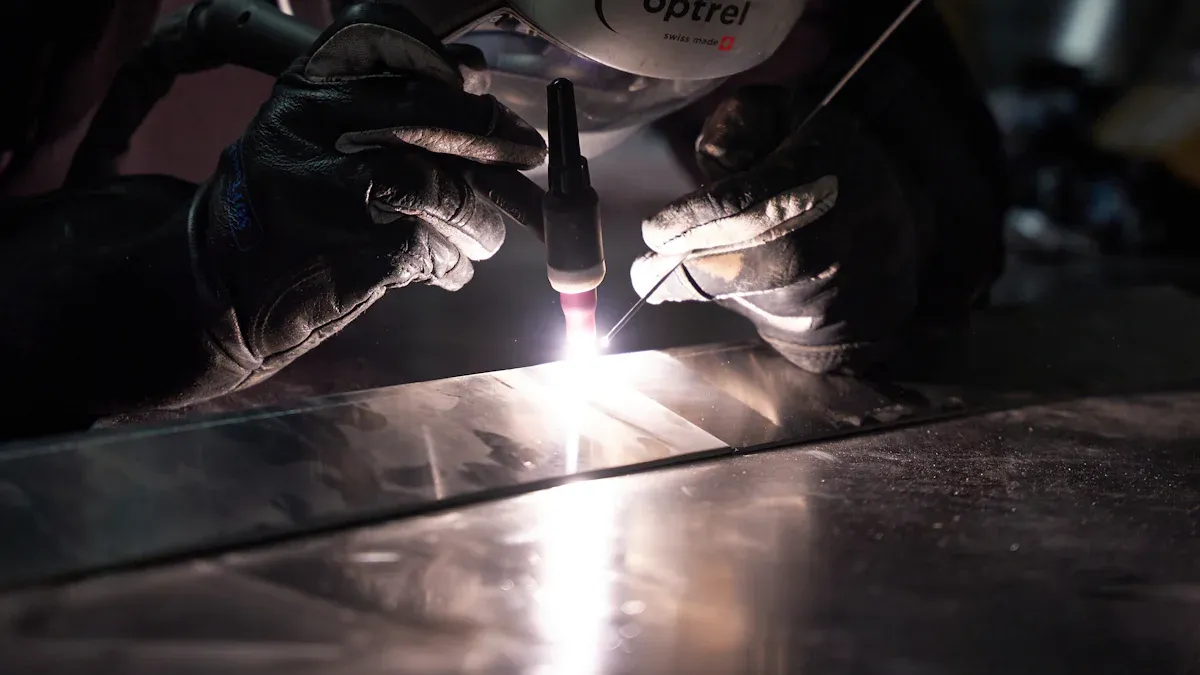
TIG welding gives you more control and a cleaner finish. You can use this welding technique for thin aluminum and projects where appearance matters, like aerospace or medical equipment. Here’s how you can master the TIG welding process:
Prepare the Metal
Clean the aluminum with acetone and a stainless steel brush. Make sure the surface is free from oil and oxide.
Set Up Your Welder
Use AC polarity for TIG welding. Adjust the balance control for more cleaning action if you see black specks. Set the frequency to 120 Hz for most jobs. Increase for thin metal, decrease for thick metal.
Torch Placement and Movement
Hold the torch steady with your hand braced on the table. Tilt the torch back 5 to 15 degrees. Keep the tungsten electrode close to the workpiece, about the diameter of the tungsten or up to 1/4 inch away. Push the torch instead of dragging it. Move your hand and torch in a steady, even motion.
Start the Weld
Wait for the weld puddle to appear as a shiny dot. Add filler rod only after you see this. Feed the rod smoothly into the puddle.
Control the Weld
Use pulsed TIG welding for better heat control. Adjust pulse frequency based on thickness. Fill craters at the end of each weld to prevent cracks.
Note: TIG welding takes more skill, but you get a beautiful, strong weld. Practice without striking an arc to improve your torch control.
Aluminum welding methods require careful heat control. Aluminum melts quickly and can warp or burn through if you use too much heat. Here are some tips to help you manage heat during welding:
Preheat the base material to 100–150 °C. This helps even out temperature and makes arc starting easier.
Use pulsed TIG welding with AC polarity. This reduces heat buildup and cleans the oxide layer.
For MIG welding, use spray transfer mode and keep a steady travel speed. Avoid weaving; stick to straight lines.
Match weld size to service needs. Don’t over weld, as this adds extra heat and causes shrinkage.
Use clamps and jigs to hold parts in place. This prevents movement and reduces warping.
Weld from the center outward and alternate sides if you have double-sided welds.
Callout: Controlling heat input is key to preventing warping and burn-through. Always check your welds for signs of distortion and adjust your technique as needed.
You might wonder which aluminum welding method is best for your project. Here’s a quick comparison to help you decide:
Aspect | MIG Welding | TIG Welding |
|---|---|---|
Process | Semi-automatic | Manual |
Electrode Type | Consumable wire | Non-consumable tungsten |
Shielding Gas | Inert Argon | Inert Argon |
Speed | Faster | Slower |
Deposition Rate | Higher | Lower |
Precision Bead Control | Moderate | High |
Spatter and Cleanup | More | Less |
Suitability for Thin Aluminum | Suitable | Ideal |
Suitability for Thick Aluminum | More than suitable | Suitable |
Joint Preparation | Less critical | Critical |
Appearance | Pleasing | Highly aesthetic |
Skill Level Required | Easier to learn | Requires higher skill |
TIG welding process gives you more control and a cleaner finish. MIG welding is faster and better for thick aluminum. You can use both welding techniques depending on your project needs.
Many beginners make mistakes when welding aluminum. You can avoid these problems with a few simple checks:
Always use AC polarity for TIG welding. DCEN does not clean the oxide layer.
Clean your metal with acetone and a stainless steel brush before welding.
Pick the right filler rod and make sure it’s clean.
Fit your joints properly and keep the torch close to the joint.
Wait for the shiny weld puddle before adding filler.
Fill craters at the end of welds to prevent cracks.
Preheat large or cast parts to reduce cracking.
Use high-quality filler metals for better results.
Porosity and cracks can weaken your welds. Clean your materials well, use the right shielding gas, and control your heat input. If you see cracks, groove them out and re-weld. For porosity, check for contamination and adjust your gas flow.
Tip: If you run into trouble, slow down and check each step. Good preparation and careful technique lead to strong, clean welds.
You might run into a few common problems welding aluminum, especially if you are just starting out. Here are some mistakes you should watch for:
Picking the wrong aluminum alloy. Not all alloys work well with tig welding, mig welding, or stick welding. Some strong alloys just do not weld with regular methods.
Treating aluminum like steel. Aluminum acts differently. It melts faster and loses strength in the heat-affected zone. If you use the same settings as steel, you will get weak welds.
Skipping joint prep and cleaning. Dirt, oil, and oxide layers cause incomplete fusion and porosity. Always clean your metal and filler rods before you start.
Using the wrong welding parameters. Too little heat or moving too fast can leave you with incomplete fusion. Too much heat can cause burn-through or warping.
Not controlling distortion. Aluminum expands and contracts a lot. If you do not use clamps or weld in short sections, your project can twist or bend.
Forgetting about post-weld heat treatment. Some alloys lose strength after welding. You may need extra steps to get the best results, but this is not always practical for big projects.
Tip: Always double-check your setup and materials before you start. These tips to weld aluminum will help you avoid the most common problems welding aluminum.
If you spot issues while welding, you can fix them with a few simple steps. Here are some tips to weld aluminum and solve common problems welding aluminum:
Clean your base and filler metals with a stainless steel brush and solvent. This stops porosity and cracking.
Let your aluminum sit in your shop for a day before welding. This prevents condensation and moisture problems.
Store your filler rods in a dry, heated place. This keeps out hydrated oxides that cause weld defects.
Use the right filler metal for your alloy. This helps prevent cracks, especially when using stick welding.
Set your shielding gas flow to the recommended rate. Use a bigger nozzle and keep it clean for better gas coverage.
Check your wire feed system if you use mig welding or stick welding. Use U-groove drive rolls and replace worn parts often.
Inspect your welds for undercut, lack of fusion, or cracks. Try non-destructive testing if you want to check inside the weld.
Preheat thick or cast parts. This helps the weld flow better and reduces the risk of cracking, especially with stick welding.
Note: If you see discoloration or smut, shorten your contact-to-work distance and use a push technique. Good troubleshooting skills make you a better welder, no matter which aluminum welding method you use.
You now know the best advice for beginners: focus on safety, clean your materials, and practice often. Here’s what you should remember:
Always wear proper PPE and keep your workspace safe.
Read your equipment manuals and follow safety rules.
Practice TIG or MIG welding for at least 80 hours to build skill.
Keep learning with guides and hands-on training.
Stay patient and keep improving your technique. If you want quality aluminum profiles or expert support, reach out to Shandong Lansi Aluminum Technology Co.,Ltd. You can do this!
You can start with MIG welding. It is faster and easier to learn than TIG welding. Clean your aluminum well, use the right wire, and practice on scrap pieces first. This helps you get comfortable with the process.
No, you need a welder made for aluminum. Steel welders do not have the right settings or features. Use a MIG or TIG welder with AC settings and 100% argon gas for best results.
Aluminum forms an oxide layer that blocks the weld. You must remove this layer with acetone and a stainless steel brush. Clean metal helps you get strong, smooth welds every time.
You can use MIG welding, TIG welding, or stick welding for aluminum. MIG is fast and good for thick pieces. TIG gives you more control and a cleaner look. Stick welding is less common but works for repairs.
Keep your metal clean and use the right filler rod. Preheat thick parts if needed. Fill the weld crater at the end. These steps help prevent cracks and make your welds last longer.

